I'm sure you've heard everyone talk about Photoshop's new Generative Fill by now, but is it ready for professional use? There's a little debate about it!
This revolutionary tool allows users to remove objects or generate new content by simply selecting an area and typing a prompt. While the AI capabilities are impressive, the results aren't always seamless when looking at it with a close eye.
The idea for this article came from a recent Facebook discussion about Generative Fill. A friend tried the tool but found the results needed extra editing to blend naturally with the rest of the image. This feedback revealed some limitations that need to be addressed to get great results.
As a retoucher and educator, I would like to provide some tips and critiques for you to consider! Proper selection, adjusting output settings, and tweaking things like brightness and contrast can help integrate the AI-generated content smoothly. Though imperfect, Generative Fill offers exciting potential for photography and design when thoughtfully applied.
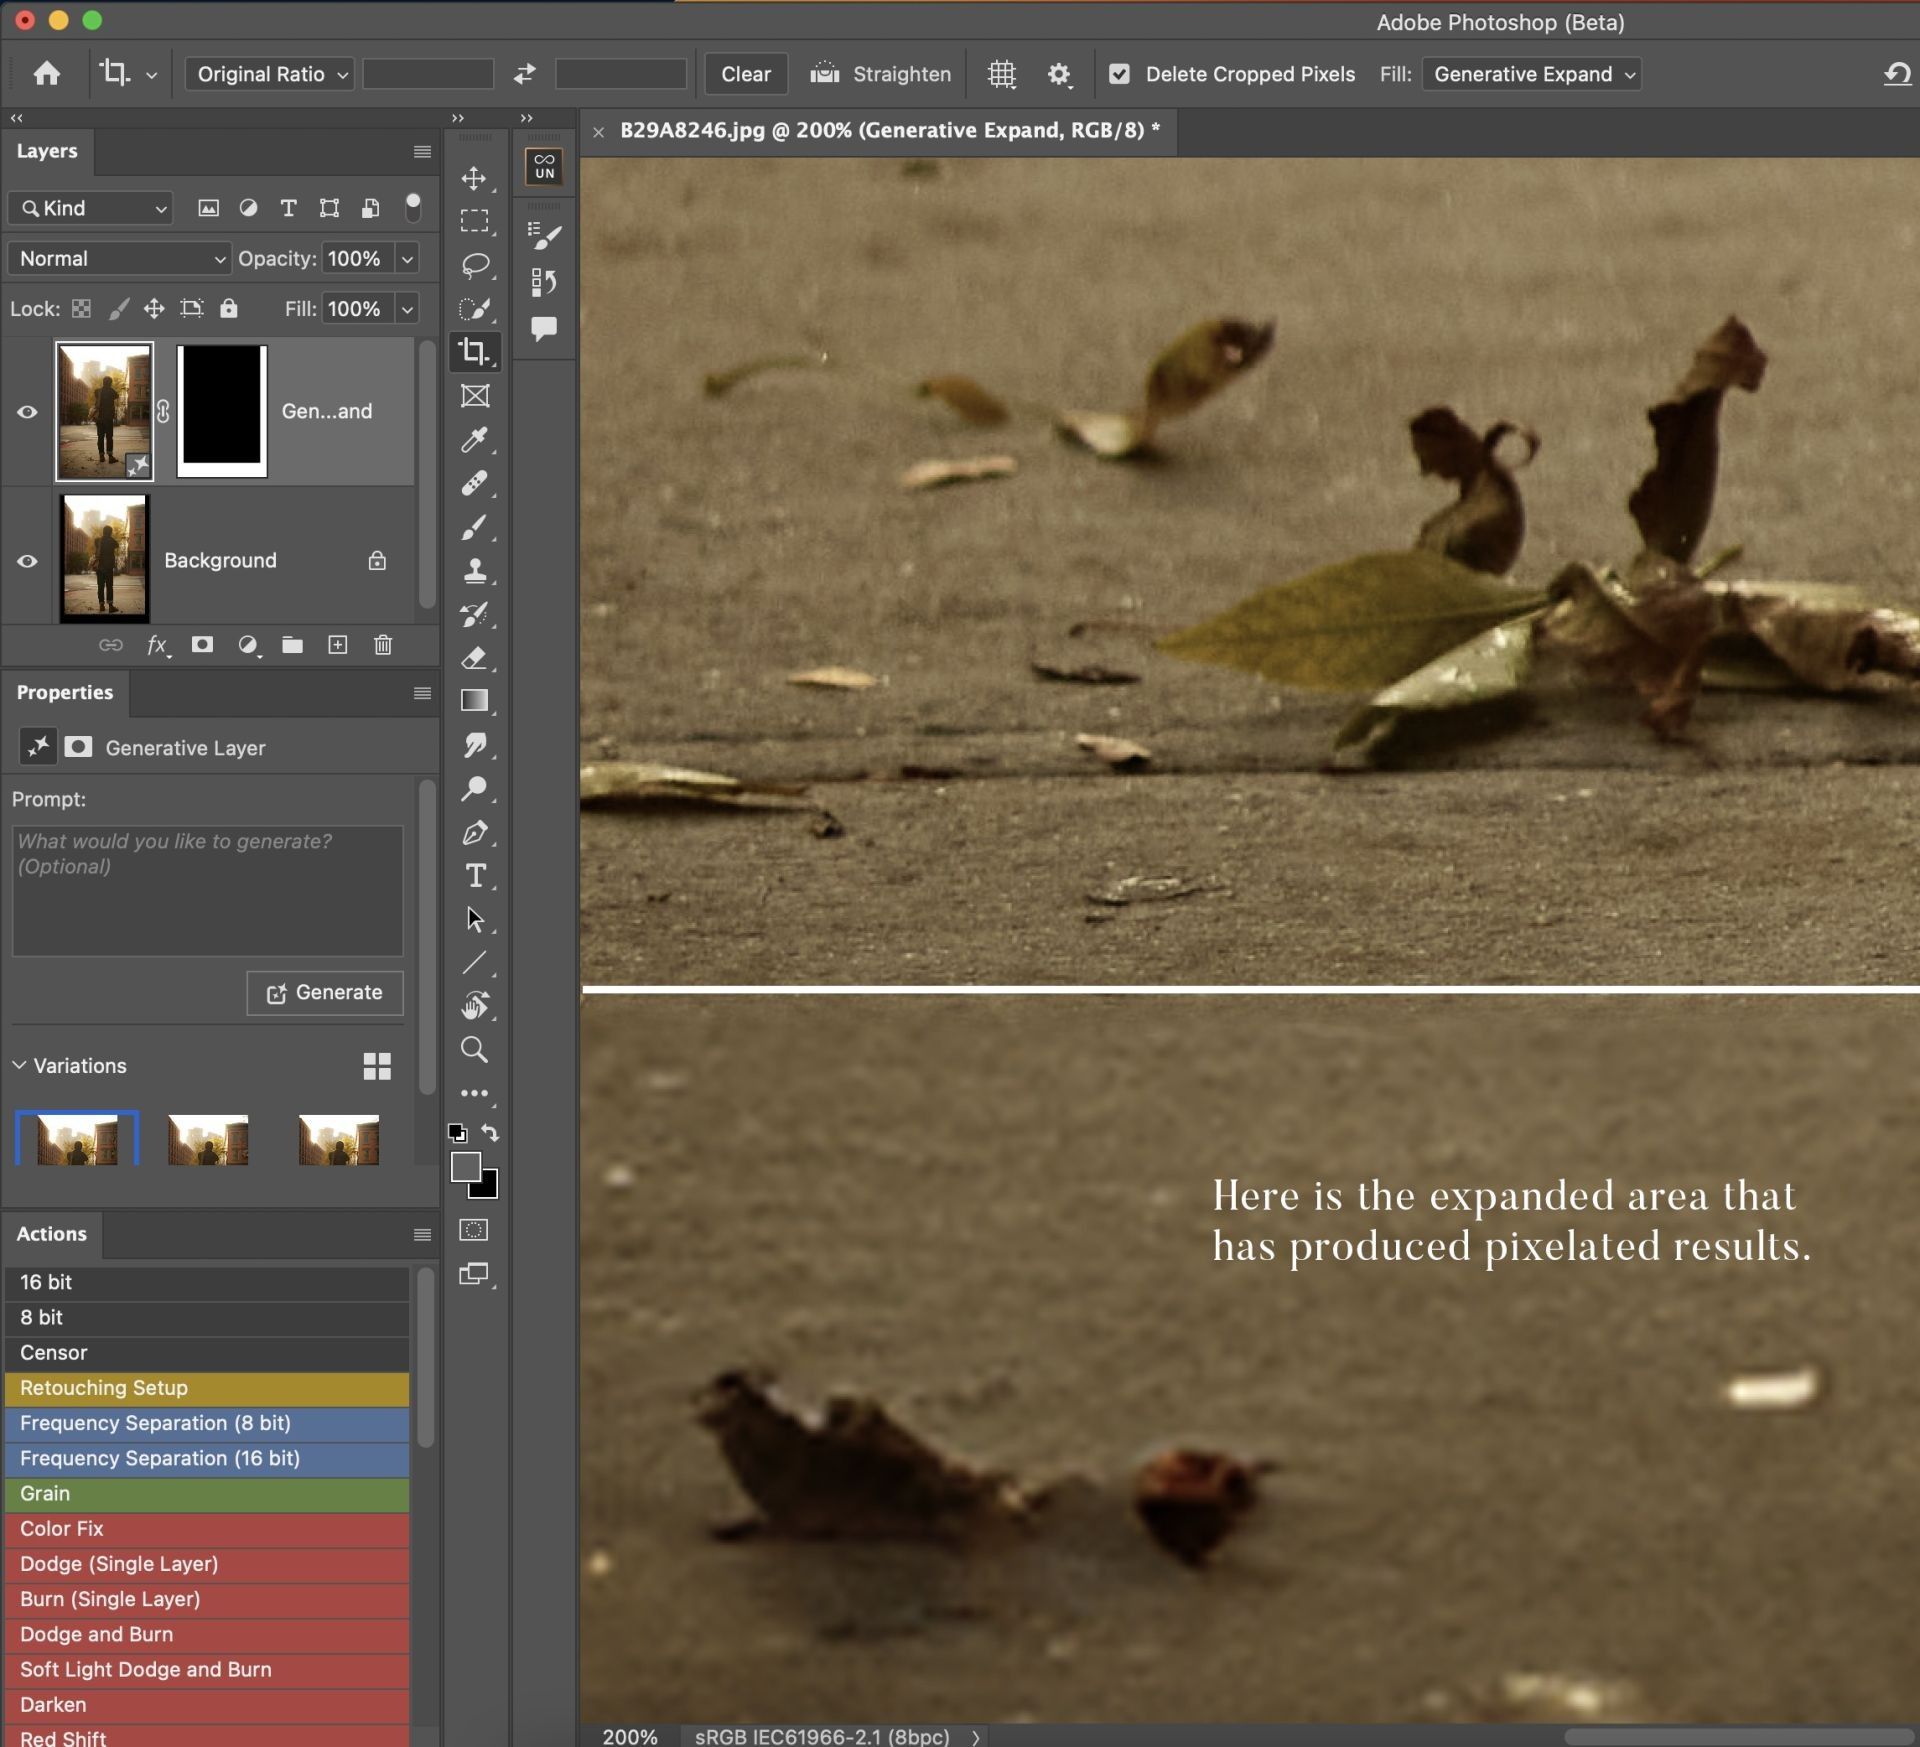
Problem: Low Quality Results
Generative fill works best when your selection is less than 1024 pixels on the longest end. Otherwise, the results can be pixelated as it will upscale them and use that to fill in the area you want to adjust.
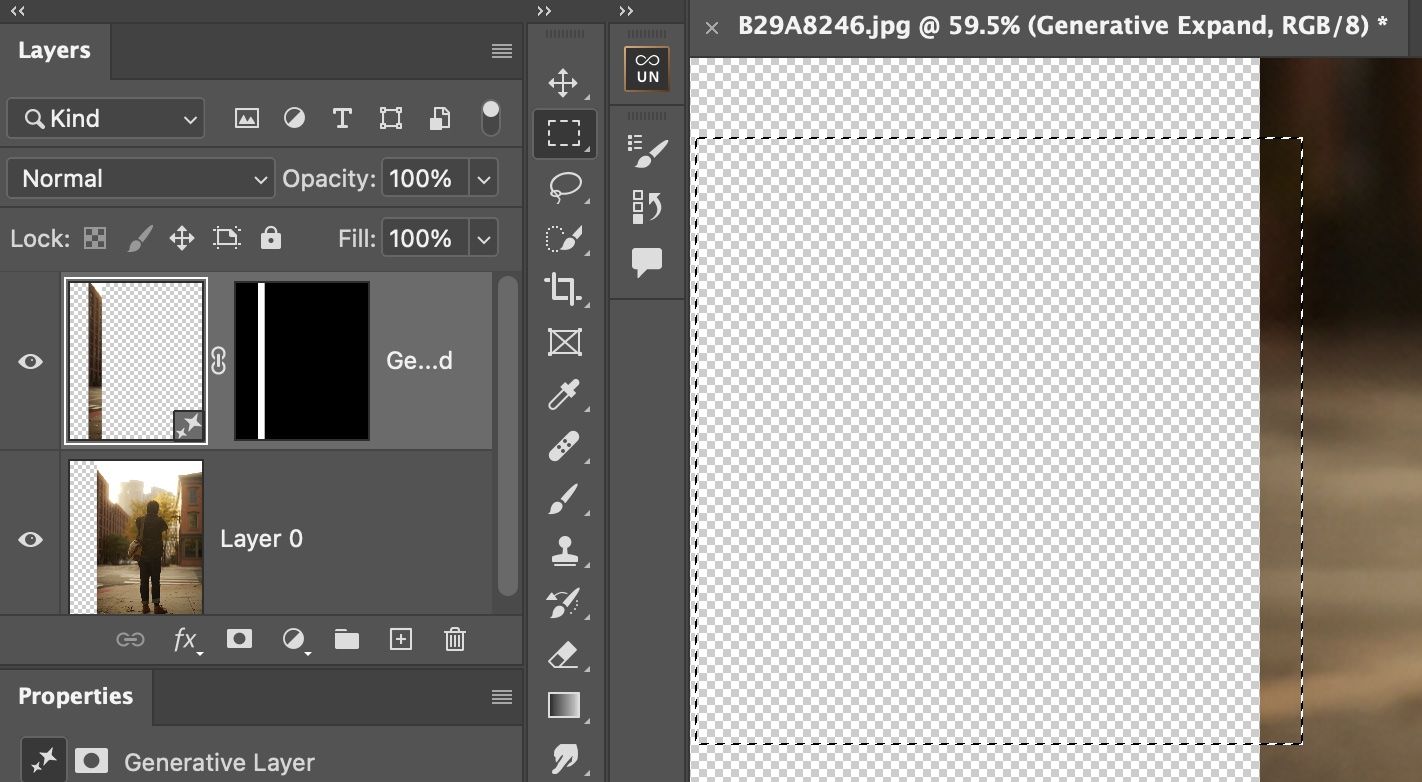
Here is an example where I tried to extend an edge of a full-resolution image (above 1024 pixels in width)! You can clearly see the distinct boundary between the two.
Solution #1: The Rectangular Marquee Tool
Using the Rectangular Marquee Tool to create a selection of at least 1024 x 1024 px will give you better results, but the downside is you have to do it segment by segment for a large area.
To create a perfect 1024 x 1024 px square each time, here are the steps:
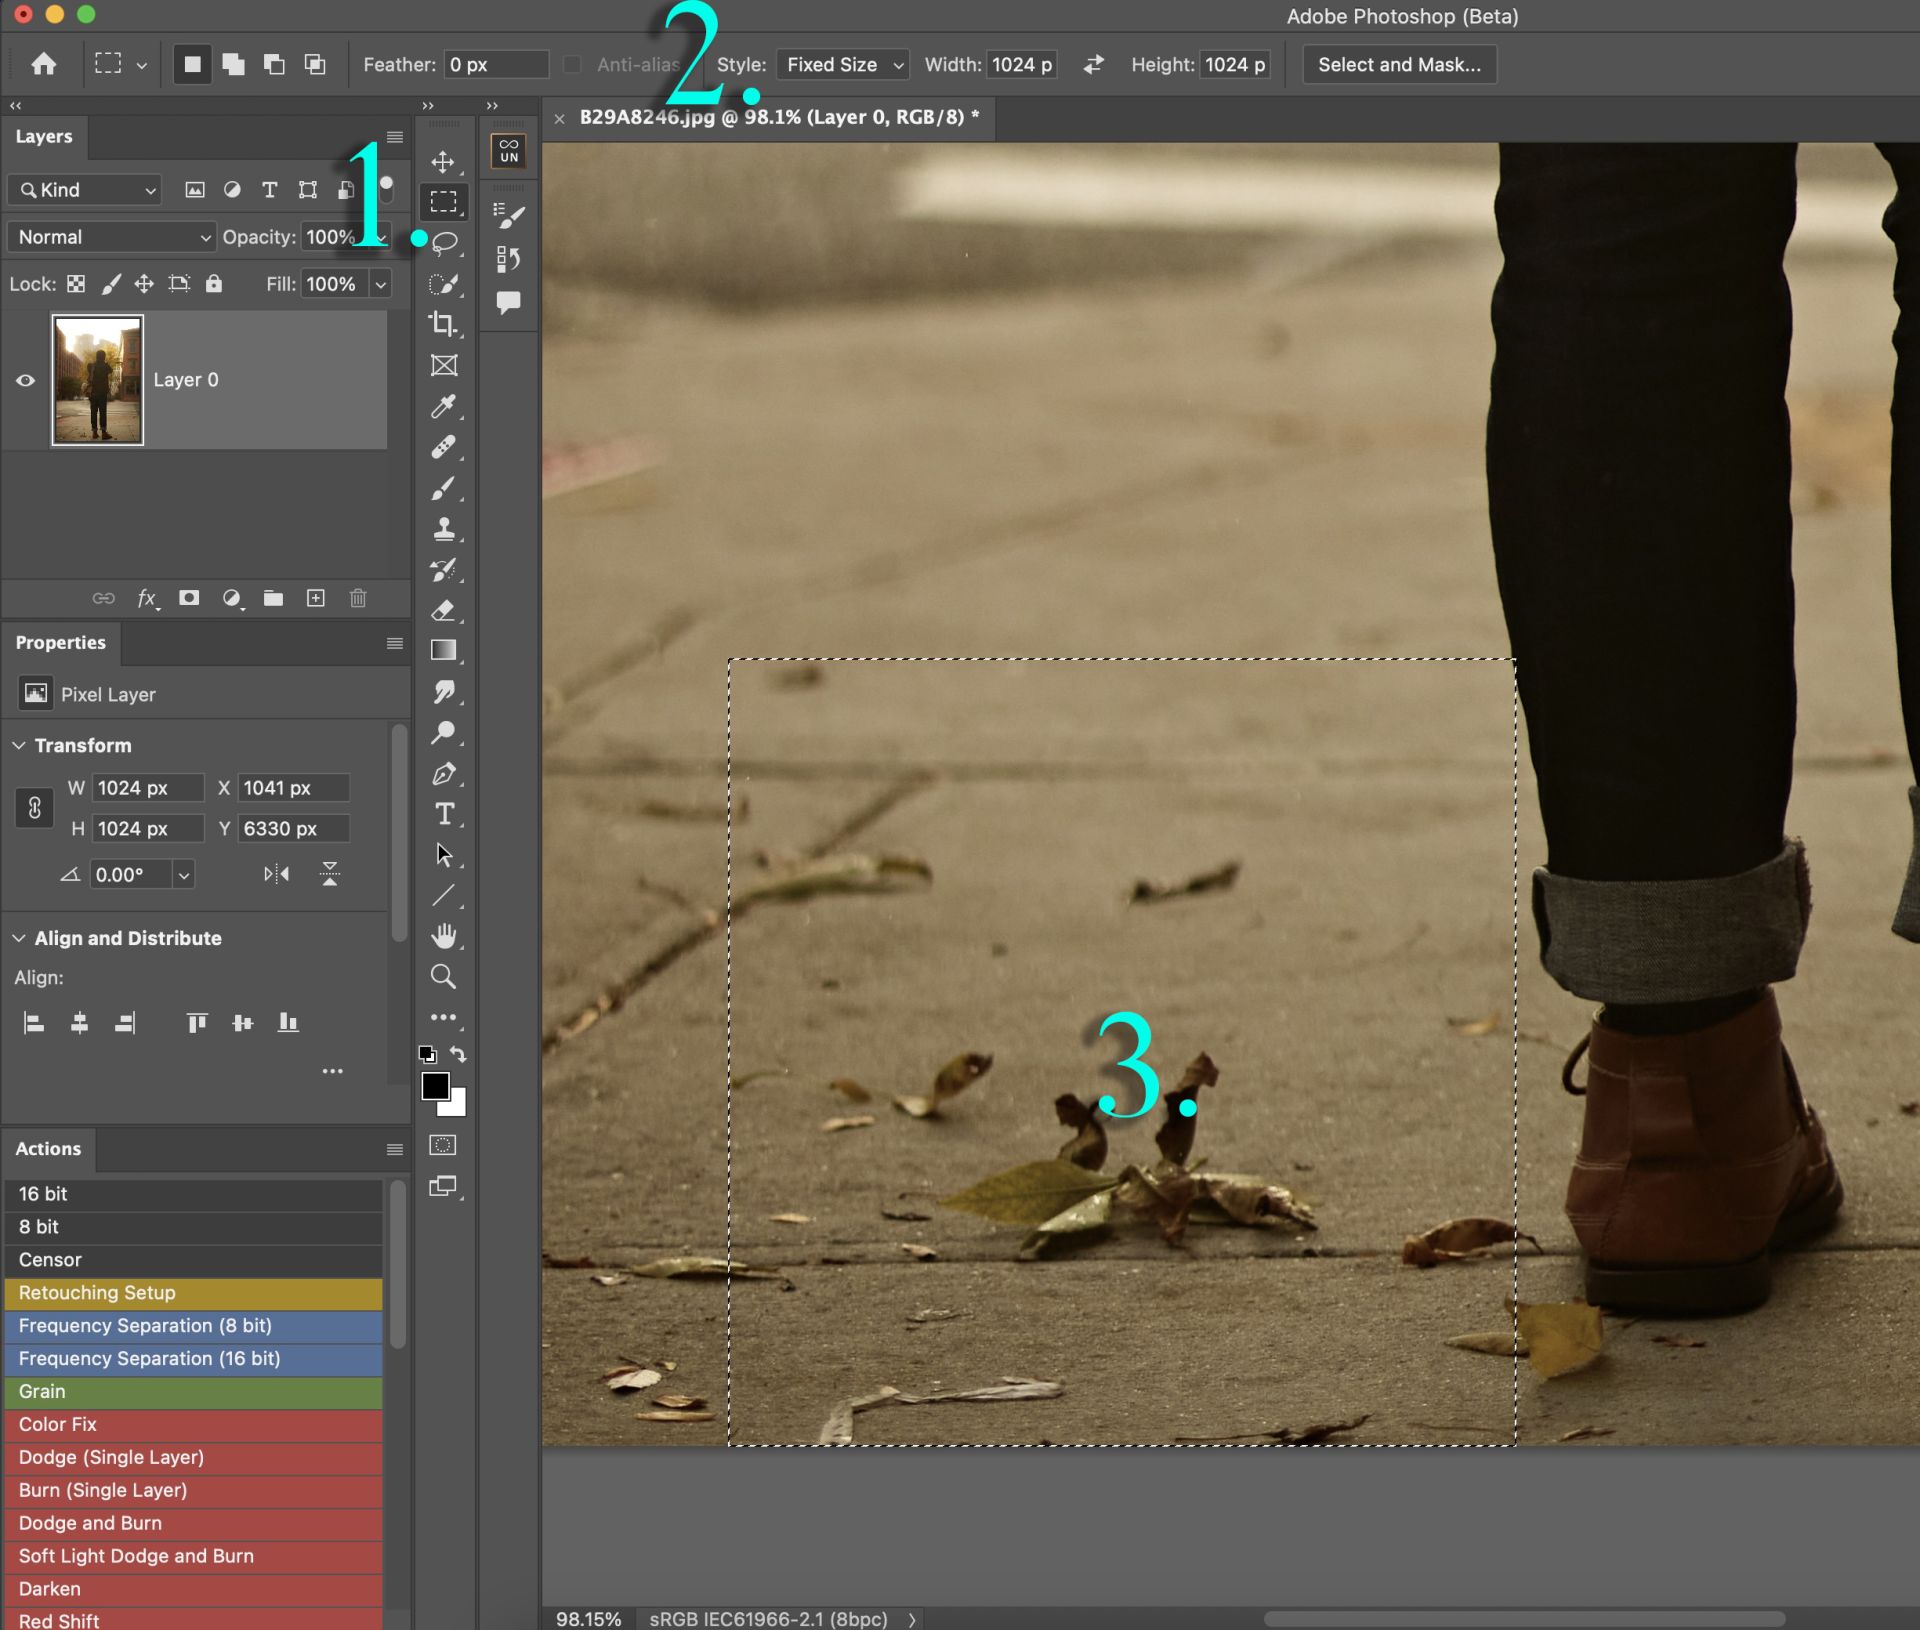
1. Select the rectangular marquee tool.
2. In the top menu bar, use “Fixed Style” and use 1024px by 1024px
3. Now you’ll see a square that you can use to fill in area by area.
2. In the top menu bar, use “Fixed Style” and use 1024px by 1024px
3. Now you’ll see a square that you can use to fill in area by area.
Pros:
This method can be excellent for expanding a document, and it will ensure great results without thinking much about it!
Cons:
As mentioned above, the downside is that if you are looking to fill in an expanded canvas, it will require you to do it step by step and be patient!
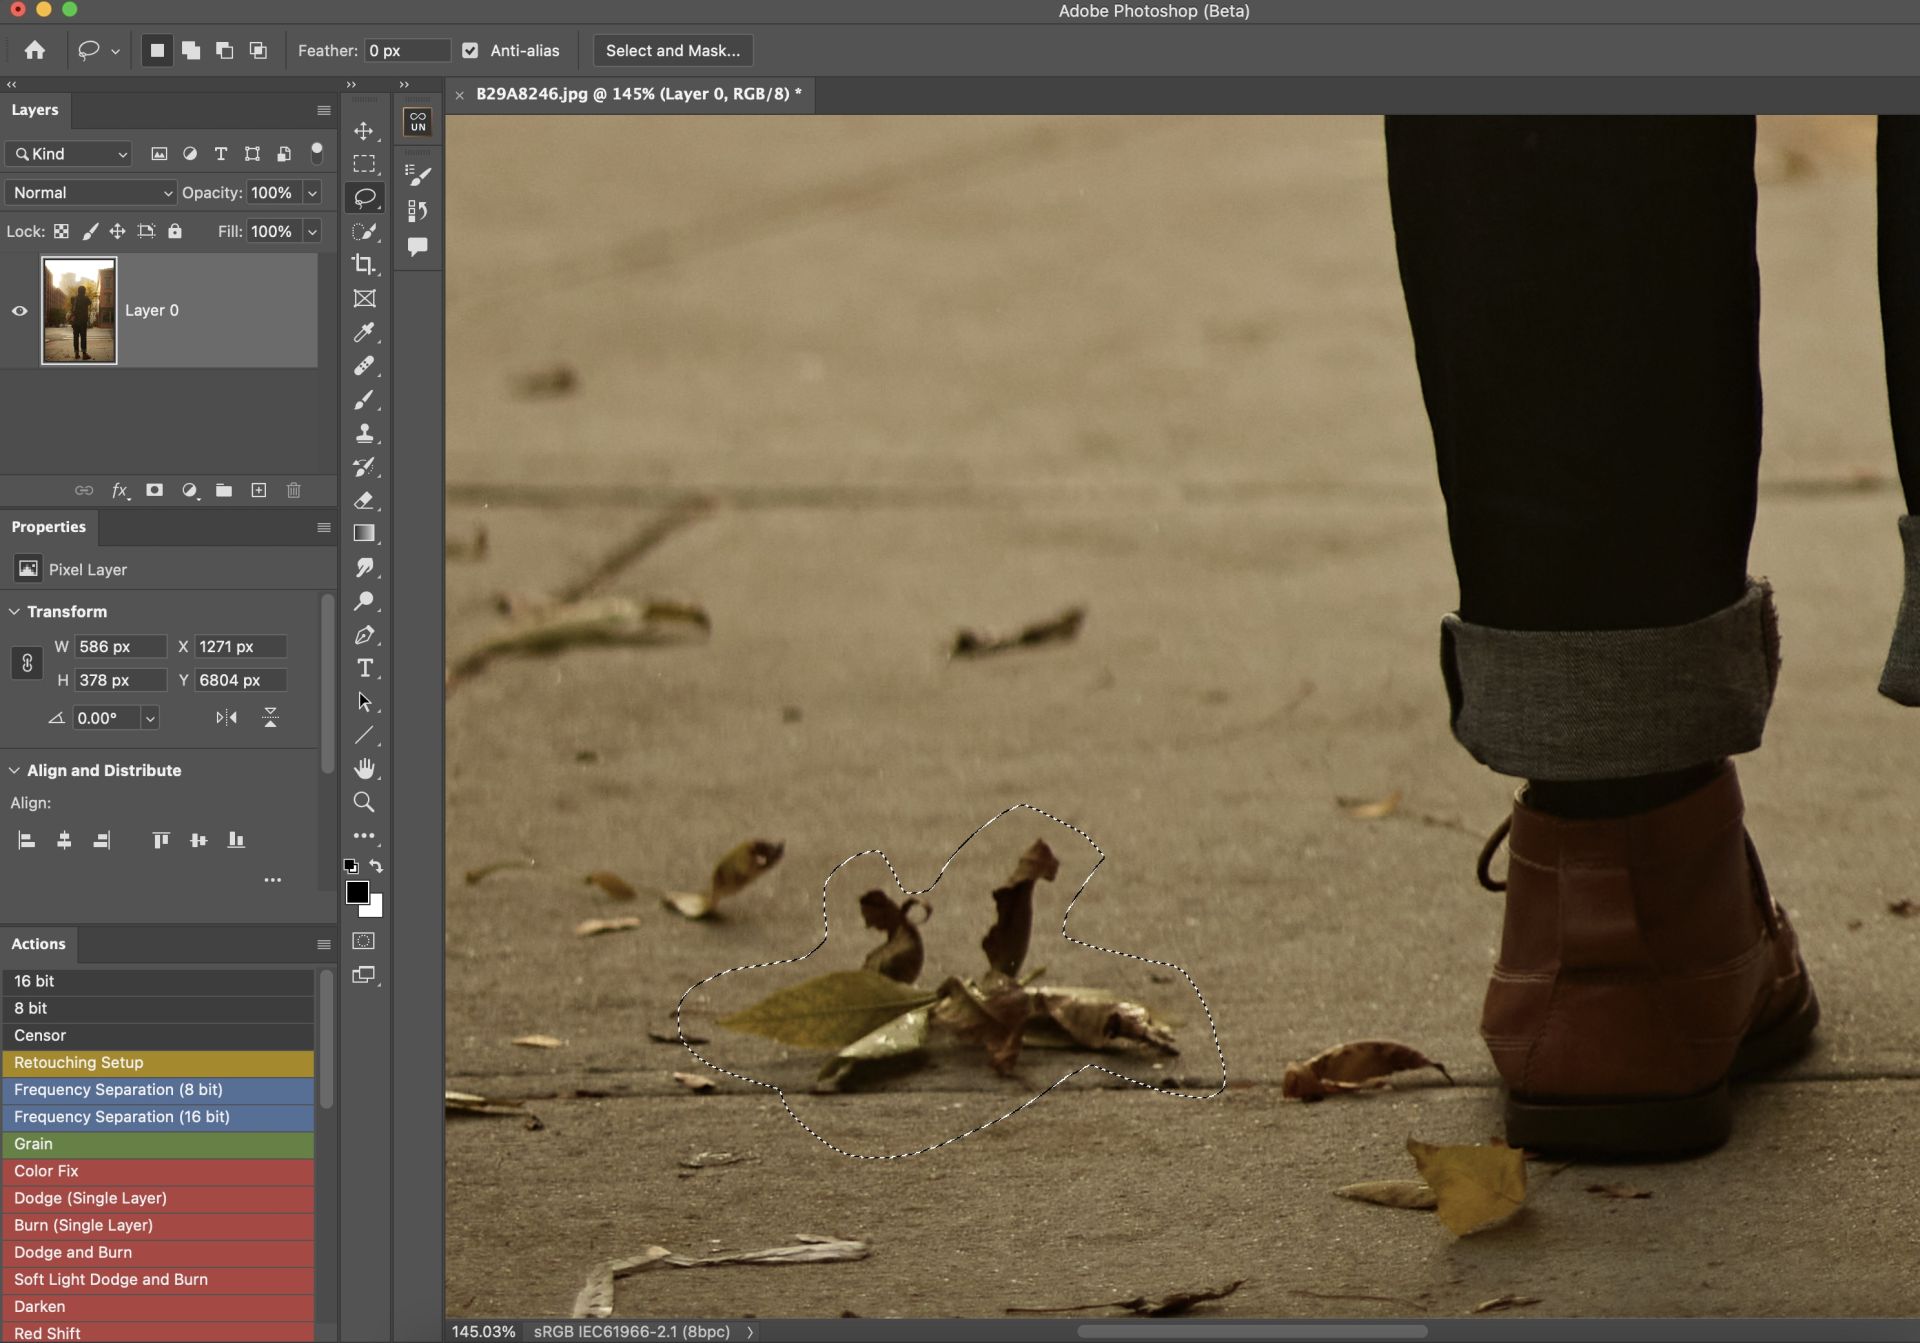
Solution #2: The Ruler Method
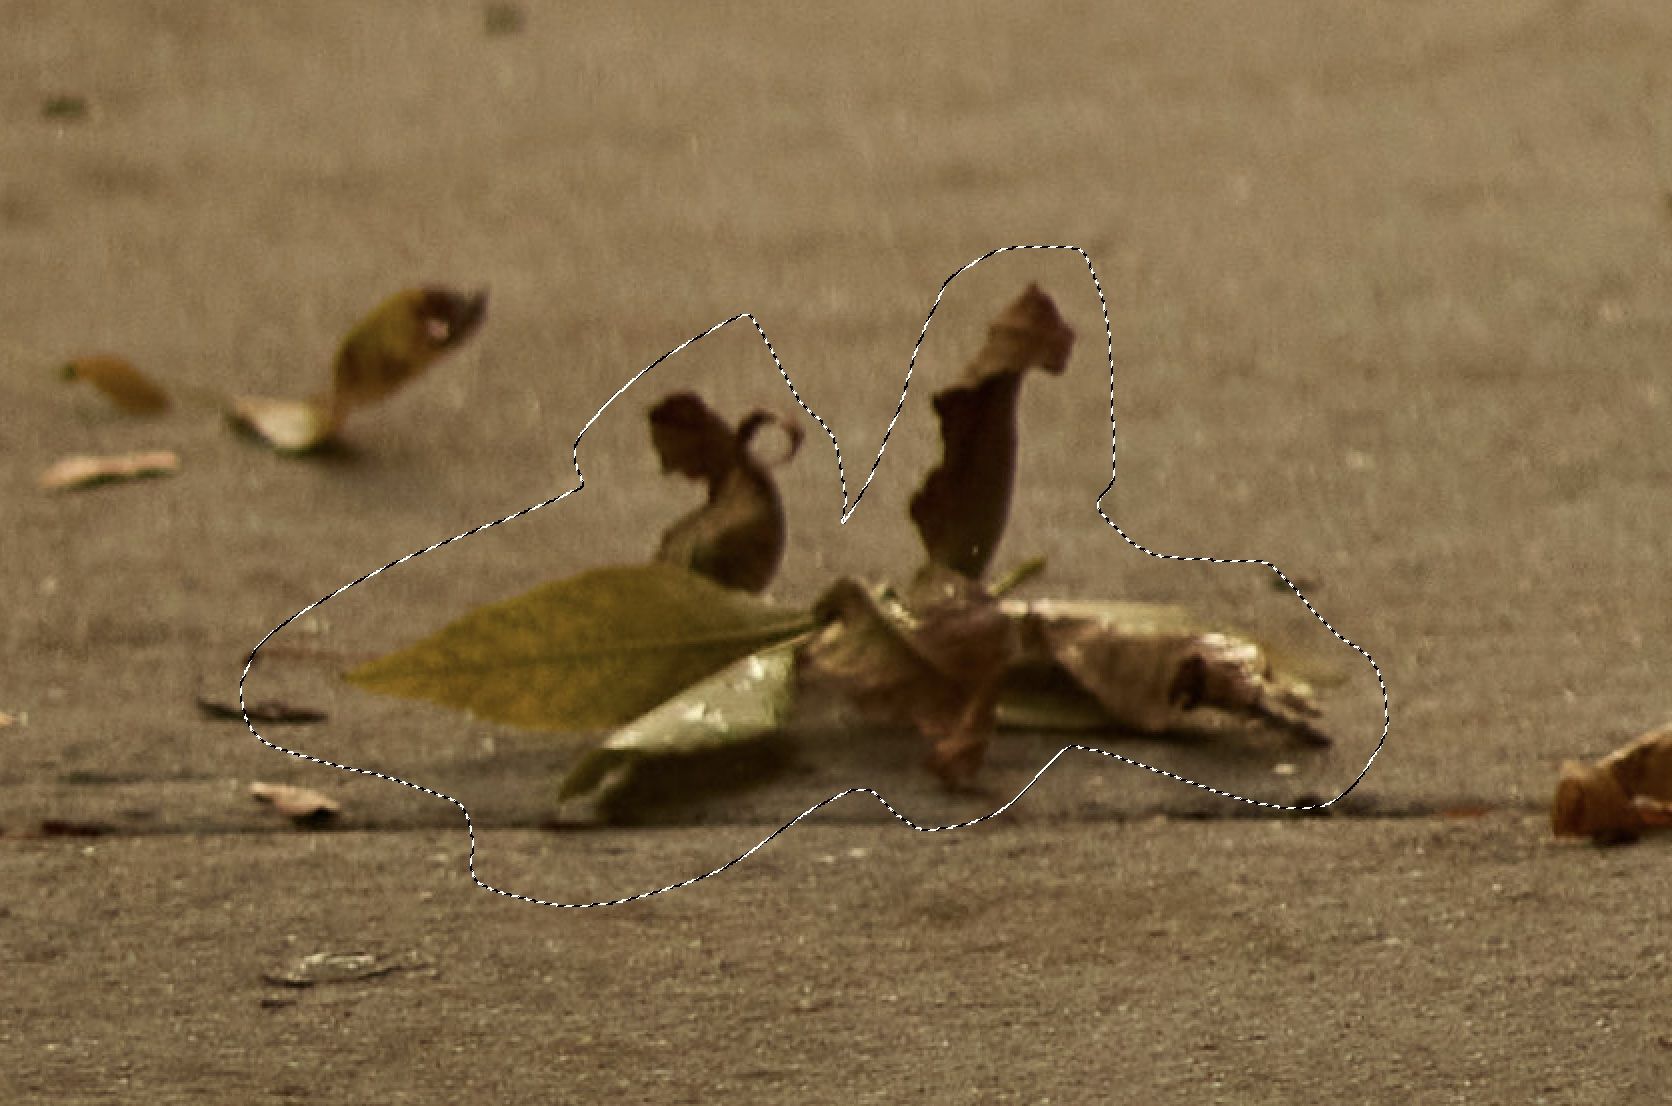
Another problem with using the Rectangular Marquee Tool is sometimes you need to remove something much smaller and in a different shape than a square would be acceptable for.
As an example, you can see below I am only trying to remove the leaves, so creating a shape matching as close to it as possible will ensure I do not disturb the areas around it. I will use the regular lasso tool instead.
However, how do you know if what you select is too big to render high-quality results, surpassing the 1024 limit? You can use the square 1024x1024 step to act as a measuring unit.
Move the square over the area you are working on. If it's bigger than what you want to remove, switch back to the lasso tool and continue working. You don't don't use the square itself to generate the results because, as I mentioned above, it may replace too much of an area.
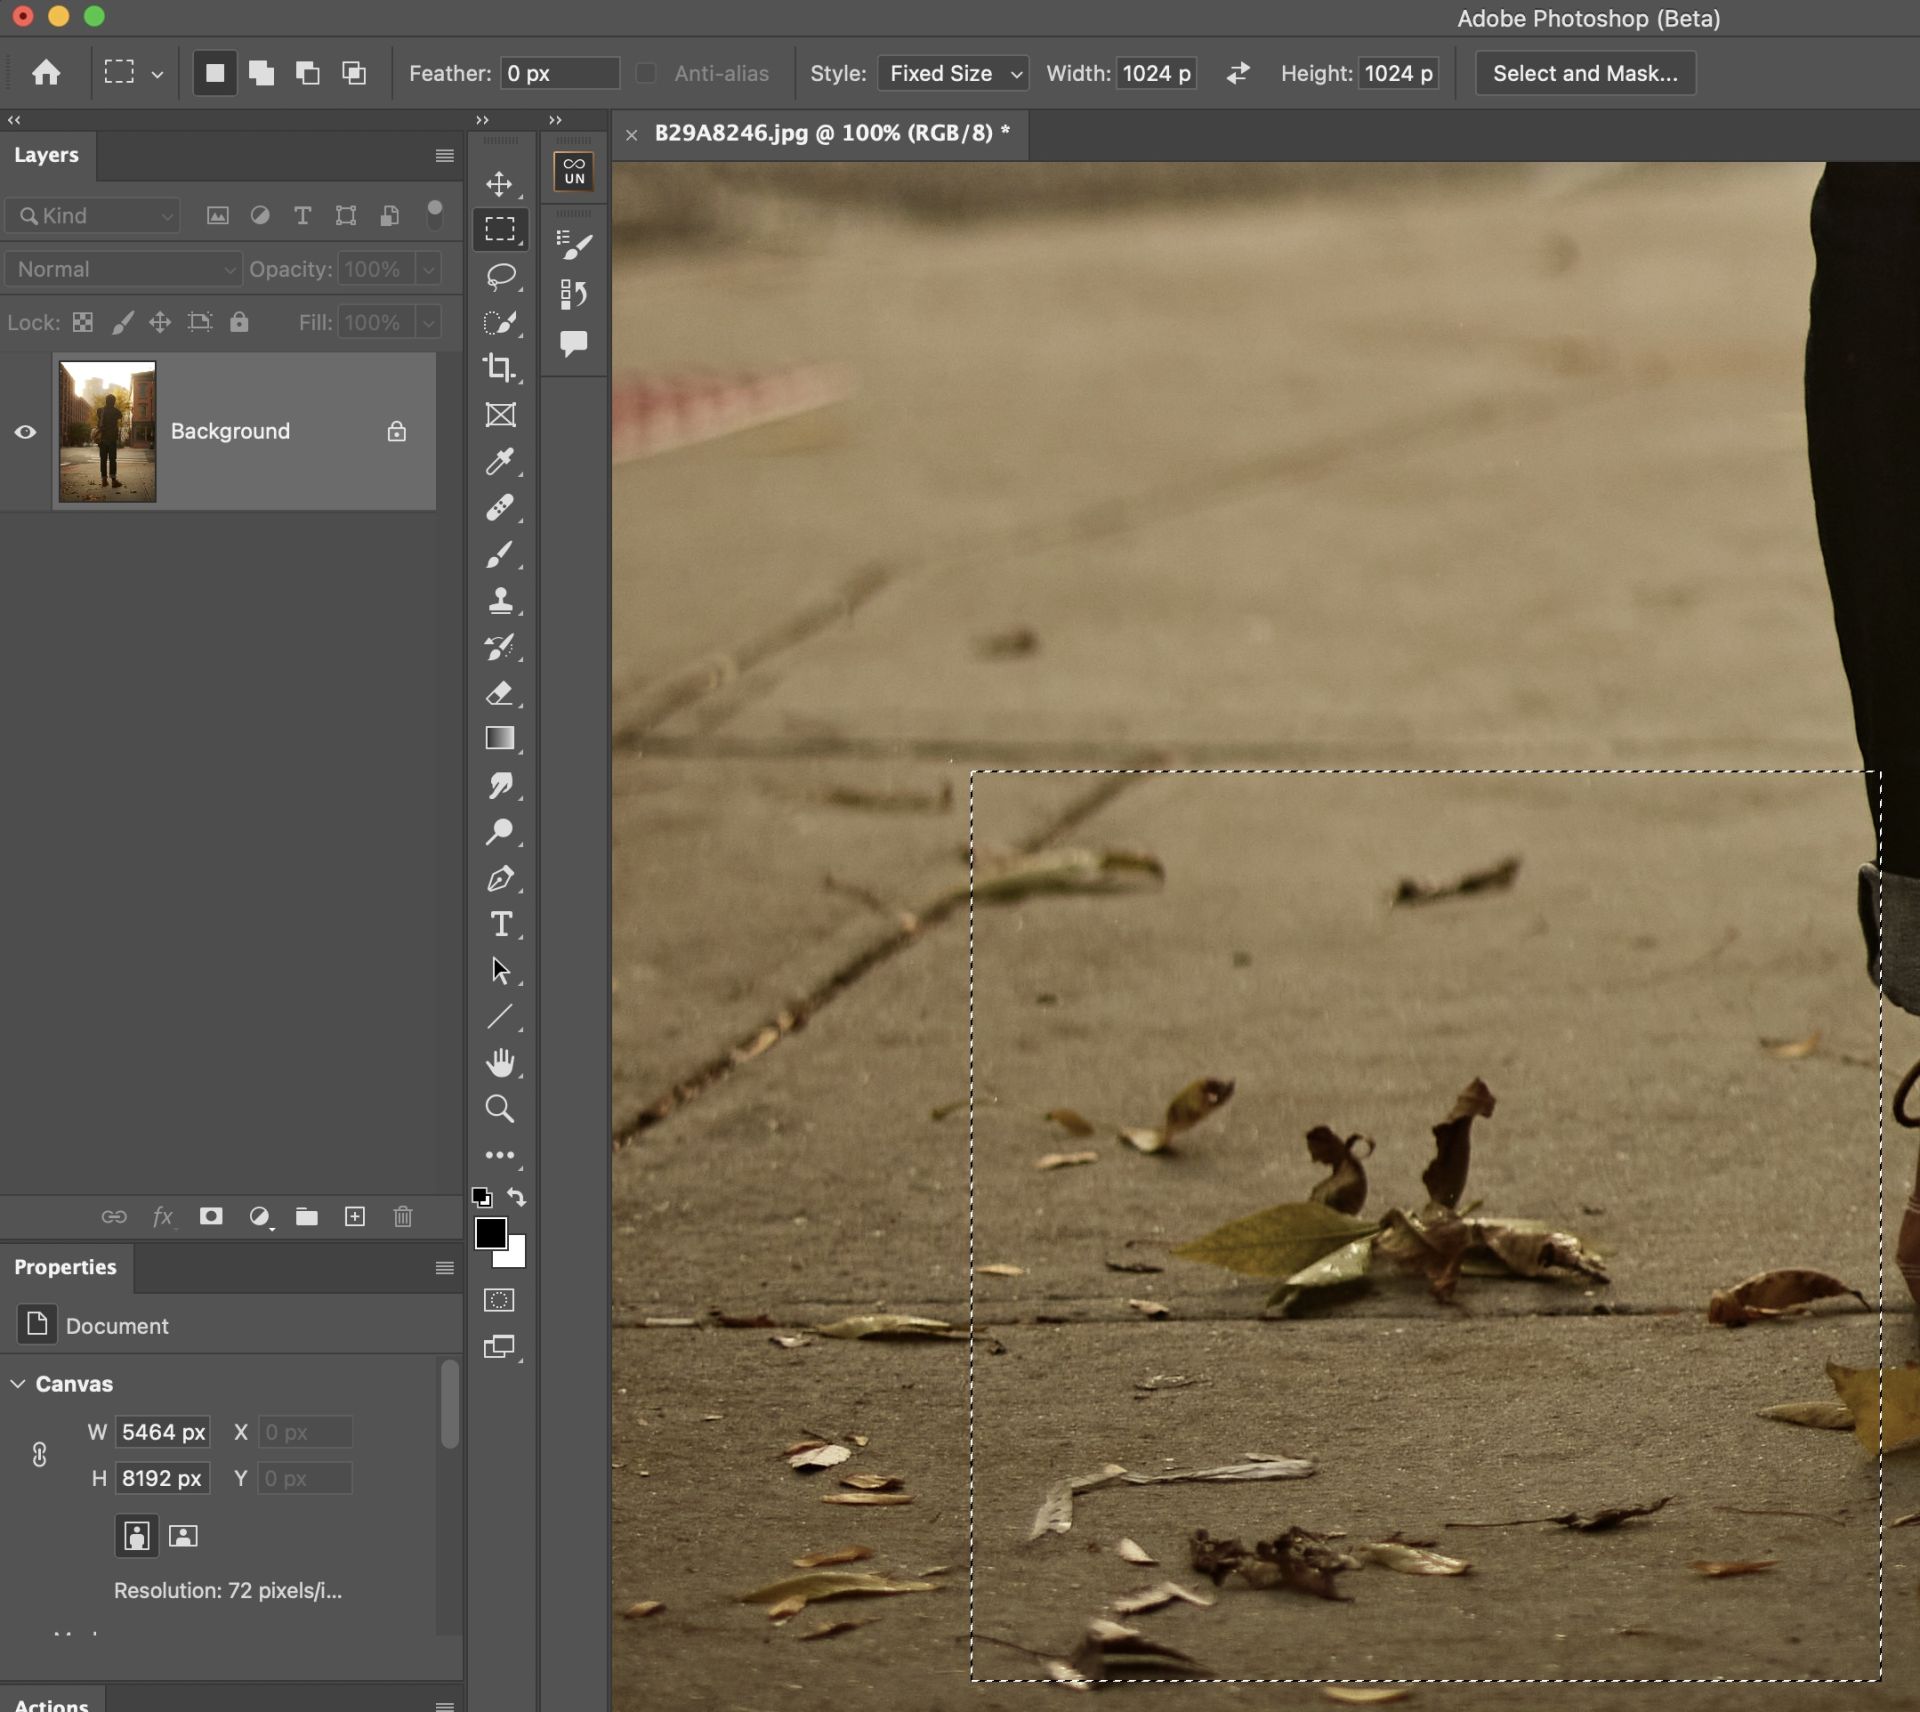
As you see in this example, it is big enough! Of course, to save time, you can generate the results with a regular lasso tool first and see if it's acceptable. If it's not, then you can use the square as a "ruler" to determine if the size of the area being modified is an issue.
Problem : Mismatched Lighting
It doesn’t happen all the time, but for some users, the results of generative fill will be slightly darker than the surrounding area.
Solution : Brighten the Results Using Curves
1. Select the Generative Fill results layer
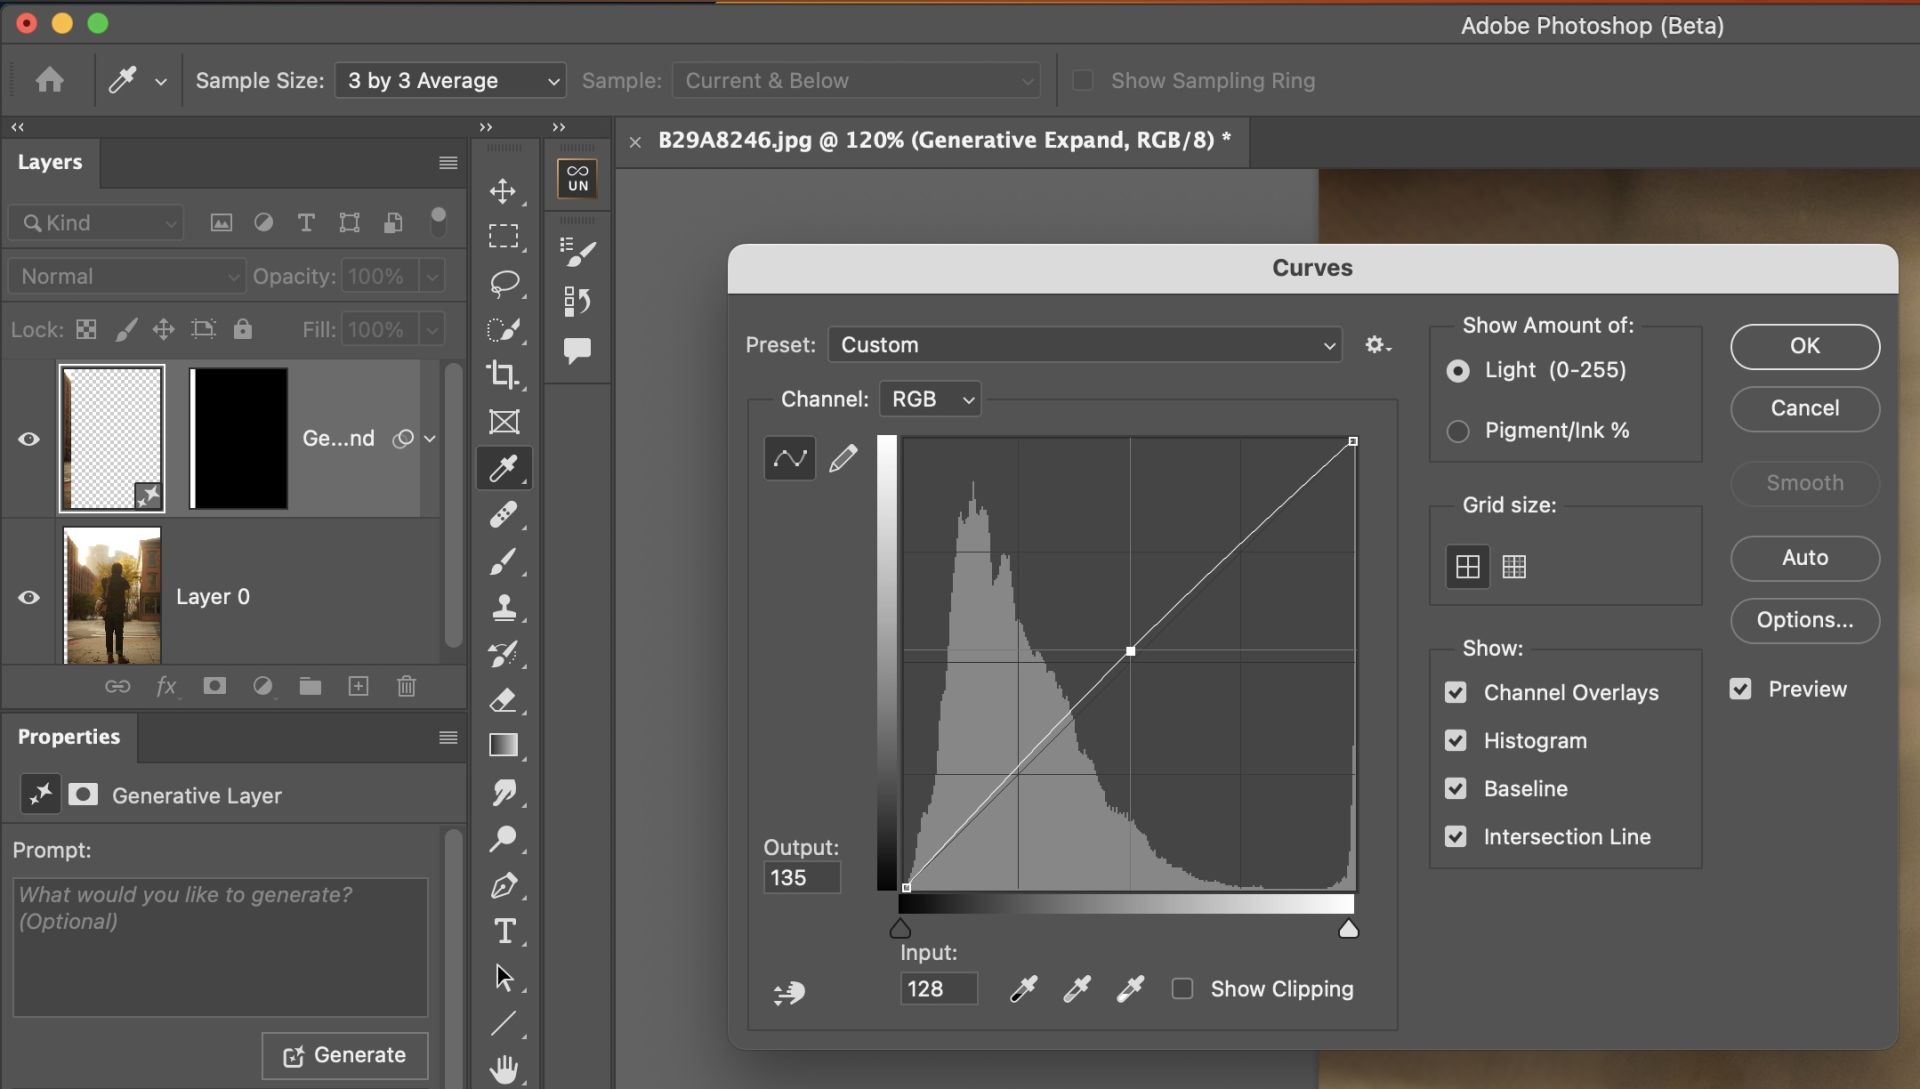
2. Go to “image > adjustments > curve” or by use the “Command+M” shortcut on a Mac (Ctrl+M on a PC) to bring up the curve adjustment layer.
3. Bring up the curve slightly until it blends in the surroundings and hit enter.
3. Bring up the curve slightly until it blends in the surroundings and hit enter.
Best Practices: Double Check the Source Area
A really important step in using generative fill is making sure you are selecting properly.
If you want to fill in a blank area, make sure you also select a little bit of the edge of the image to provide context for the generative Ai to do its magic!
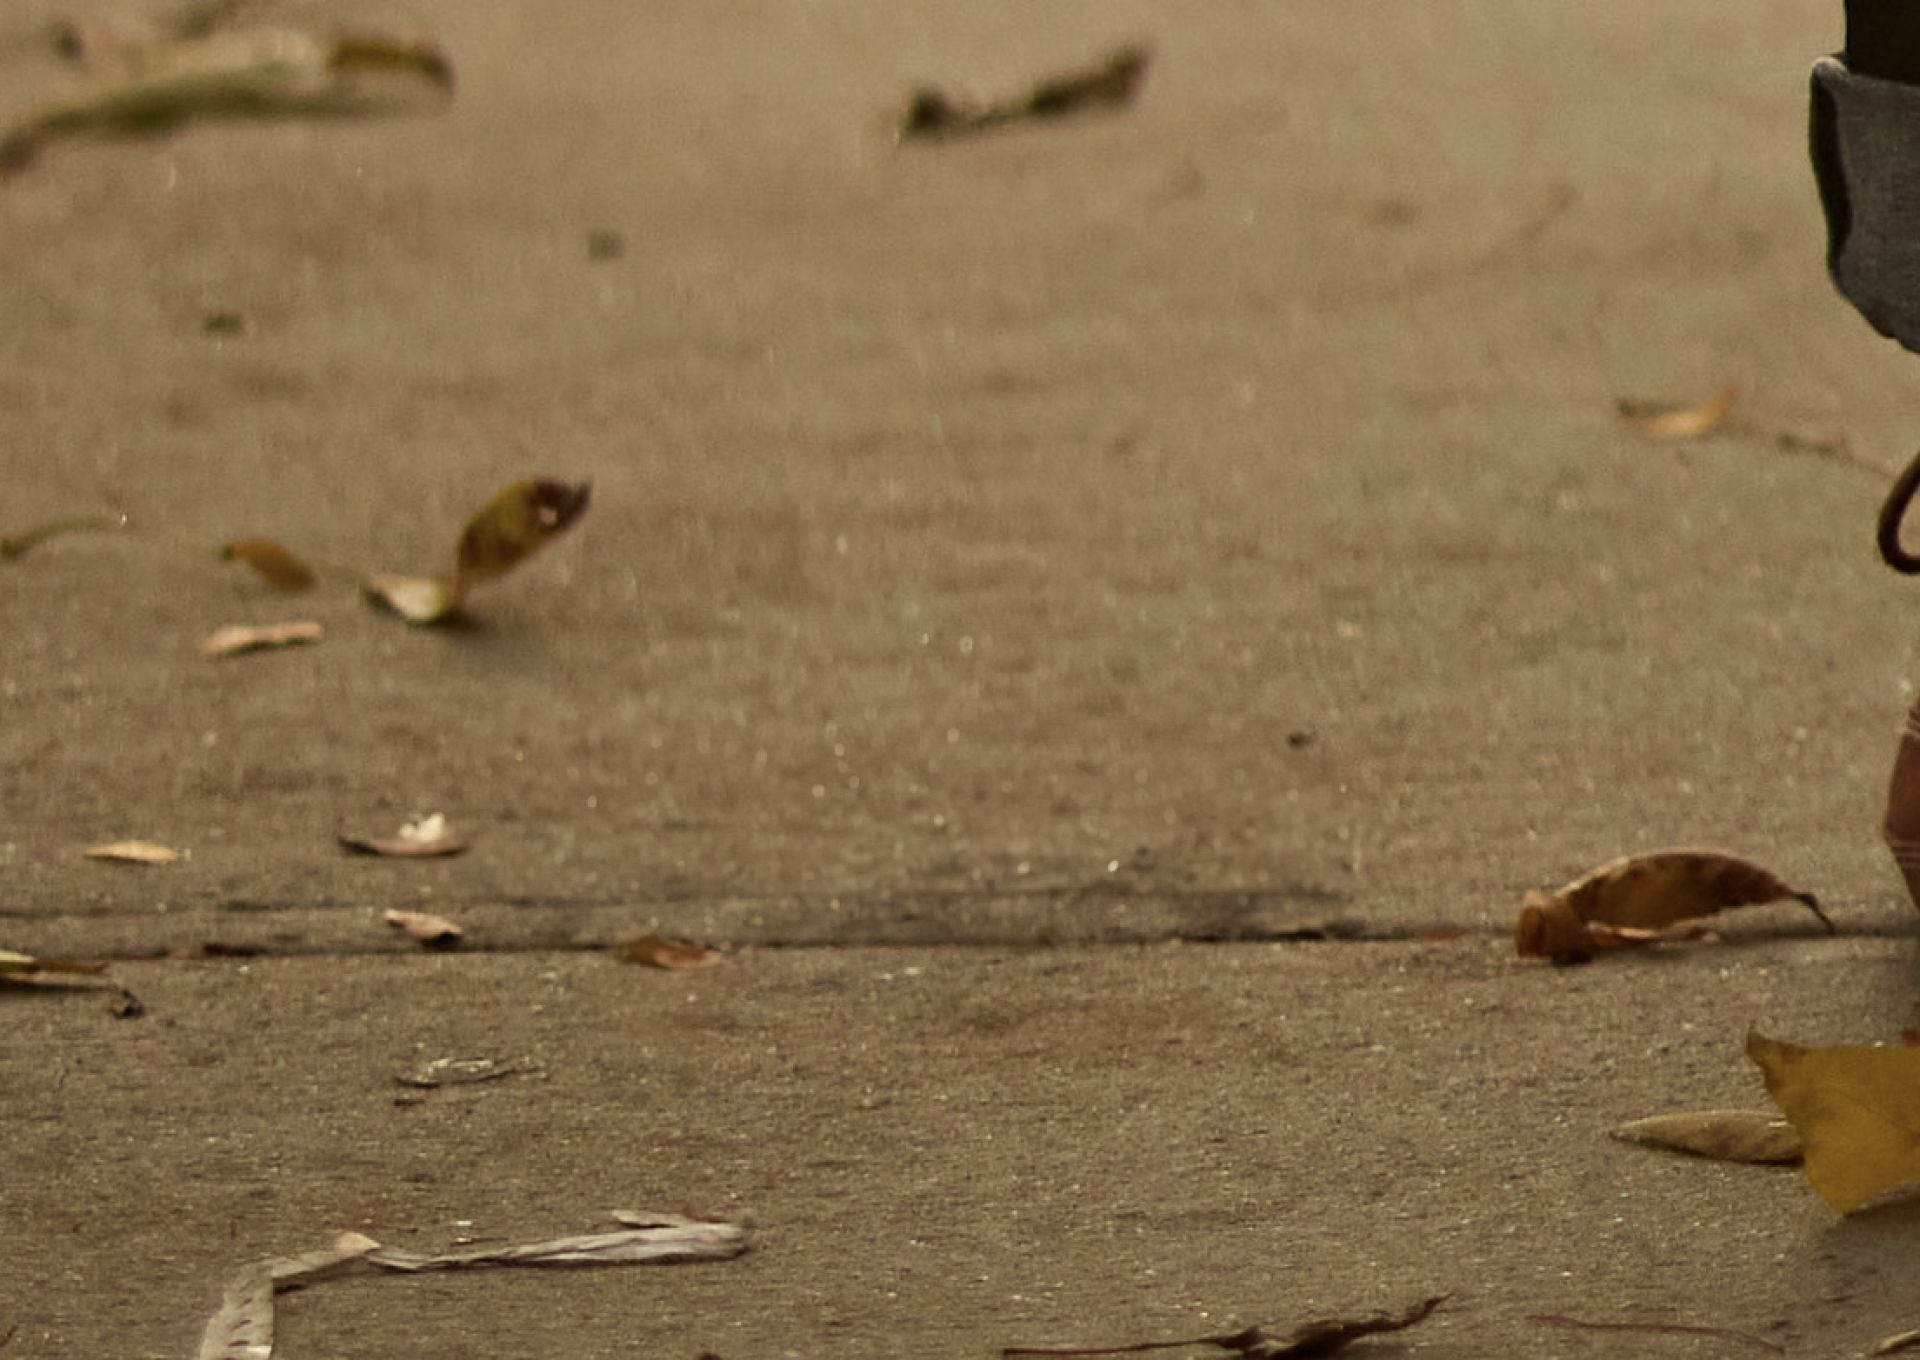
If you are trying to remove something, like these leaves, make sure you select the leaves as well as a little more of the area surrounding it. This is great because you don't need to be perfect, and it will actually benefit the results!
Here’s the results of this example:
Conclusion
With a bit of finesse, you can get fantastic results from generative fill that look like they belong in the photo. The technology still has limitations, but using proper selections and output settings goes a long way. Over time, generative fill will improve as the Ai trains on more image data.
About the Author
Pratik Naik
Pratik Naik is a leading visionary in retouching and photography who inspires and mentors professionals worldwide. As the founder of Infinite Color, he simplifies complex editing processes with innovative Photoshop plugins and tools. He shares his knowledge and expertise through workshops and online education, nurturing the next generation of creative minds.
Write your awesome label here.
Are you curious how Ai tools can enhance creativity and keep your business relevant in a rapidly evolving industry?
Check out Pratik's course, "Ai For Photographers," which simplifies the process of integrating Ai tools into your current workflow with clear steps.
Created with